


What are XML Sitemaps and Its Importance in SEO? Create and Add XML Sitemaps to Search Console
March 28, 2024What is XML Sitemap & How is it Important?
An XML Sitemap contains a list of webpages (links) of a website, so that when Googlebot crawl in the file, it knows which links are important for the website owner. It helps search engines to understand the website structure of the website as well.
Although search engines can find your site links without a sitemap, but that only if you have a great internal linking structure. That means, each and every links are properly structured so that it is pointing to your homepage. However, if you have a website with large number of pages, or a site with complex structure, it’s keep an eye on the internal linking, making your links undiscoverable by googlebot.
This is why you need an XML sitemap, where you add all your website pages along with other essential information, giving a clear instruction to search engine bots that these are the pages you need to crawl and index.

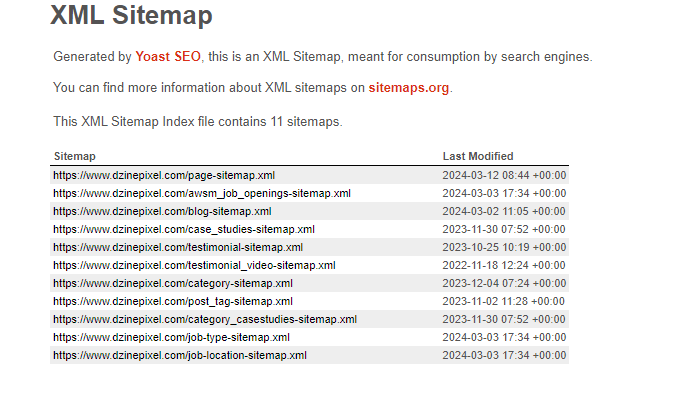
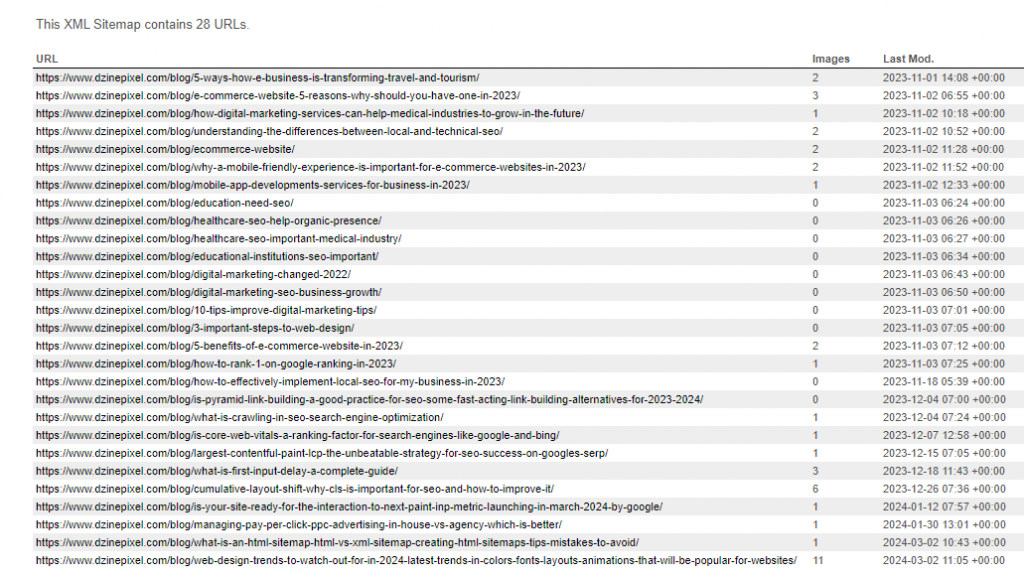
What Does an XML Sitemap Look Like?
This sitemap includes:India’s best digital marketing agency – DZINEPIXEL WEBSTUDIOS2024-03-21Services2024-03-20 https://www.dzinepixel.com/portfolio 2024-03-18
-
An XML version declaration, which helps search engines understand the file type.
-
The URL set, which defines the protocol for search engines.
-
Each URL listed with its location (URL) and when it was last modified (lastmod).
How to Check If Website Has Xml Sitemap?
Does Every Websites Need an XML Sitemap?
-
Websites with a large number of pages
-
Websites with large archives
-
Websites containing rich media content
-
Websites with external links
Does Google Index All the Pages Within the XML Sitemap?
How to Make Google Find Your Sitemap?

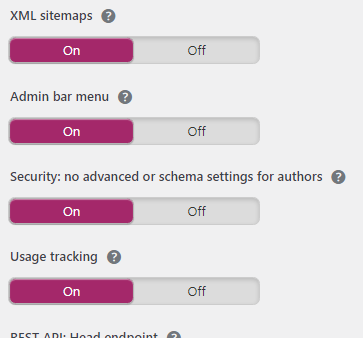
How to Add Sitemap XML in WordPress via Yoast SEO?
Enable XML Sitemaps:
Submit XML Sitemap Manually To Search Engine
Upload the XML Sitemap in Root Directory:
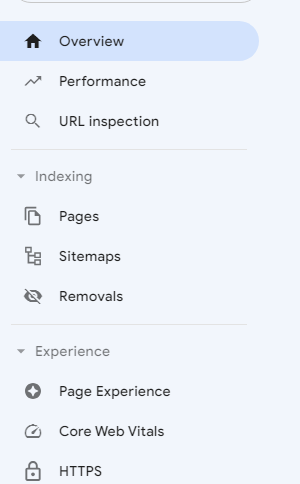
Update XML Sitemap in Google Search Console Account

How to Create XML Sitemap for Website?
You can create XML Sitemap through manually, sitemap generator tool, or a plugin. Manually Generate XML Sitemap:
If your website is small and simple, you can manually create an XML sitemap using a text editor or XML editor.
Start by listing all the URLs of your website in an XML format with tags, including the necessary elements like (URL), (last modified date), (change frequency), and (priority).
Example of an XML Sitemap
// Define an array of URLs for your website
$urls = array(
'https://www.example.com/',
'https://www.example.com/about',
'https://www.example.com/services',
'https://www.example.com/contact'
);
// Create the XML sitemap
$xml = ‘
‘;
foreach ($urls as $url) {
$xml .= ‘
‘ . $url . ‘
‘ . date(‘Y-m-d’) . ‘
‘;
}
$xml .= ‘
‘;
// Set the appropriate headers
header(‘Content-type: application/xml’);
// Output the XML content
echo $xml;
?>
How to Create Xml Sitemap in PHP?
// Define an array of URLs for your website
$urls = array(
'https://www.example.com/',
'https://www.example.com/about',
'https://www.example.com/services',
'https://www.example.com/contact'
);
// Create the XML sitemap
$xml = '
';
foreach ($urls as $url) {
$xml .= '
‘ . $url . ‘ ‘ . date(‘Y-m-d’) . ‘ ‘; } $xml .= ‘ ‘; // Set the appropriate headers header(‘Content-type: application/xml’); // Output the XML content echo $xml; ?> This PHP script defines an array of URLs for your website and then dynamically generates the XML content for the sitemap, including the and elements for each URL. Finally, it sets the appropriate headers and outputs the XML content. You can customize this script to include additional information such as the last modified date for each URL. Make sure to replace ‘https://www.example.com/’ with your actual website URLs.
Xml Sitemap Generator for Blogger
Blogger, Google’s blogging platform, automatically generates XML sitemaps for blogs hosted on its platform. You don’t need to create one manually.
Here’s how you can access your XML sitemap on Blogger:
- Access Your Blogger Dashboard: Log in to your Blogger account and navigate to the dashboard for your blog.
- Settings: In the left sidebar, click on “Settings”.
- Search Preferences: Click on “Search preferences”.
- Sitemap: Under the “Crawlers and indexing” section, you’ll find the “Custom robots.txt” option. Click on “Edit” next to it.
- Accessing Sitemap: In the custom robots.txt editor, you’ll see a line that looks like this:
Sitemap: https://yourblog.blogspot.com/sitemap.xml
This is the URL of your XML sitemap. You can access it by clicking on the link.
- Submitting Sitemap to Google: If you want to submit your sitemap to Google Search Console, copy the sitemap URL and paste it into the “Sitemap” section of your Google Search Console account.
Blogger automatically updates and maintains your XML sitemap, so you don’t need to worry about generating or updating it manually.
Factors to Consider While Submitting XML Sitemap
- Sitemap Accuracy: Ensure that your XML sitemap accurately represents the structure of your website and includes all relevant URLs that you want to be indexed by search engines.
- XML Sitemap Format: Follow the XML sitemap format specified by search engines, including correct syntax, tags, and structure. Use tools or validators to check for any errors in the XML file.
- URL Inclusion: Include all important pages of your website in the XML sitemap, such as main content pages, category pages, product pages, and others that you want to be indexed and ranked by search engines.
- URL Exclusion: Exclude any pages that you don’t want to be indexed, such as duplicate content, private pages, or pages with sensitive information. Use robots.txt directives or meta tags to prevent indexing of such pages.
- Priority and Change Frequency: Although not directly used by search engines, consider adding and attributes to indicate the importance and update frequency of URLs. While these attributes may not impact indexing directly, they can provide additional information to search engines.
- Sitemap Size: Keep your XML sitemap within the size limits specified by search engines. For Google, the uncompressed size limit is 50MB and can contain up to 50,000 URLs.
- Regular Updates: Update your XML sitemap regularly to reflect any changes or additions to your website’s content. This ensures that search engines have access